![[nestjs] Service](https://img1.daumcdn.net/thumb/R750x0/?scode=mtistory2&fname=https%3A%2F%2Fblog.kakaocdn.net%2Fdna%2FD8sEu%2Fbtq0c1Mdkfe%2FAAAAAAAAAAAAAAAAAAAAAJ7Mg-uiszAFtpRsyMLCm-SX3rG0Suvpz6O4Z5OrMDap%2Fimg.png%3Fcredential%3DyqXZFxpELC7KVnFOS48ylbz2pIh7yKj8%26expires%3D1767193199%26allow_ip%3D%26allow_referer%3D%26signature%3DXuJqhKDILFbK8Fal953ncf5OGzs%253D)
nestjs에서 Service를 생성하려면 다음 명령을 사용합니다.
| nest g s |
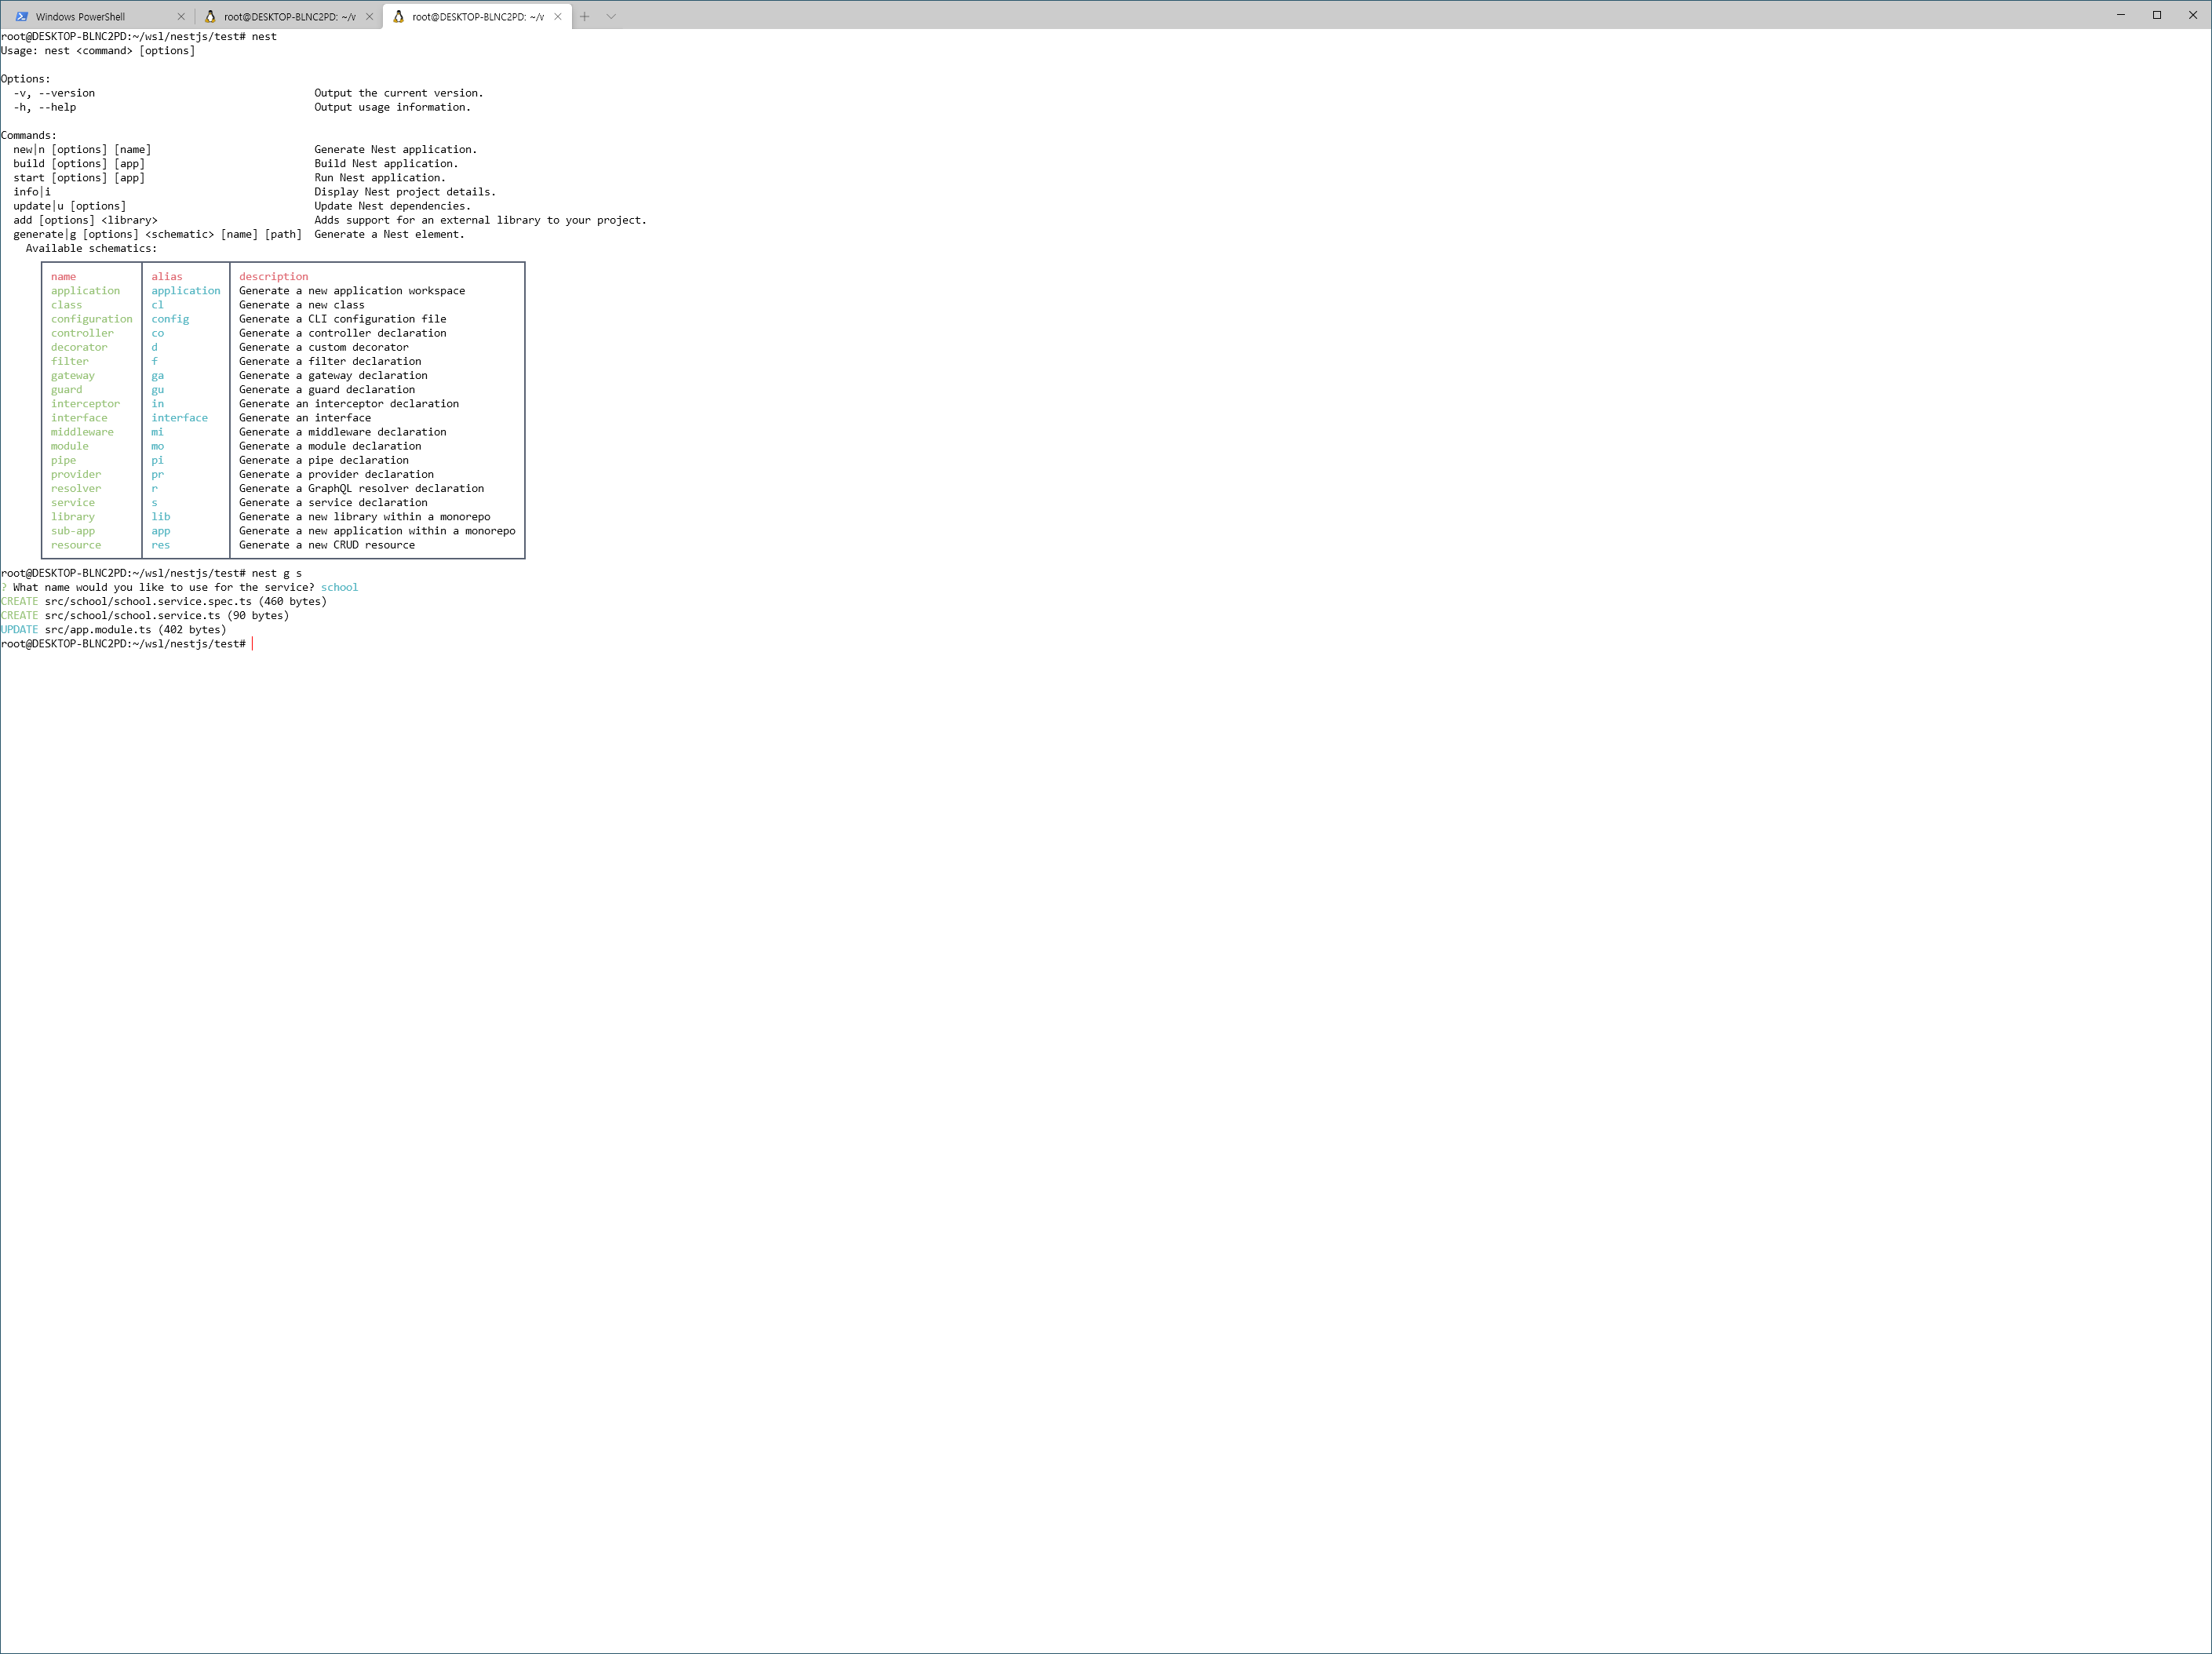
Service 이름을 입력하고 다음으로 넘어갑니다.
Service가 생성되면 app.module.ts와 관련 파일이 생성되어 있음을 확인할 수 있습니다.
import { Module } from '@nestjs/common';
import { AppController } from './app.controller';
import { AppService } from './app.service';
import { SchoolController } from './school/school.controller';
import { SchoolService } from './school/school.service';

@Module({
  imports: [],
  controllers: [AppController, SchoolController],
  providers: [AppService, SchoolService],
})
export class AppModule {}
다음으로 프로젝트로 생성된 school디렉터리 안에서 model이라는 디렉터리를 새롭게 생성하고 해당 폴더 안에서 아래의 내용으로 stdent.model.ts파일을 작성합니다. 디렉터리 이름에서도 알겠지만 DB(예제에서는 배열) 사용을 위한 모델을 만들어 둘 것입니다.
export class student {
    id: number;
    name: string;
    subjects: string[];
};
그리고 새롭게 생성된 school.service.ts파일에서 students라는 하나의 배열을 생성해 타입을 모델로 생성한 student로 지정하고 student을 추가하기 위한 addStudent() 함수와 전체 student를 모두 가져오는 함수를 추가합니다.
import { Injectable } from '@nestjs/common';
import { student } from './model/student';

@Injectable()
export class SchoolService {
    private students: student[] = [];

    addStudent(student) {
        this.students.push({
            id: this.students.length + 1,
            ...student
        });
    }

    getStudents() {
        return this.students;
    }
}
Controller에서는 생성자를 통해 Service를 객체를 받을 수 있도록 정의한 다음 아래와 같이 Get과 Post에 대응하는 2개의 함수를 추가합니다. 참고로 생성자에서 SchoolService를 가질 수 있도록 작성하면 import는 자동으로 추가됩니다.
import { student } from './model/student';
import { SchoolService } from './school.service';

@Controller('school')
export class SchoolController {
    constructor(private readonly schoolService: SchoolService) {}

    @Post()
    async setStudent(@Body() std:student) {
        this.schoolService.addStudent(std);
        return await this.schoolService.getStudents();
    }

    @Get()
    async getStudents() {
        return await this.schoolService.getStudents();
    }
}
특히 addStudent함수에서는 student을 추가하는 Serivce의 addStudent()함수를 호출한 뒤 전체 student를 반환하도록 하고 있으며 getStudent() 함수에서는 지정한 ID에 해당하는 student만을 가져오도록 하고 있습니다.. 또한 예제에서는 Controller와 Service사이에 함수 이름을 동일하게 처리했지만 함수명은 달라도 무관합니다.
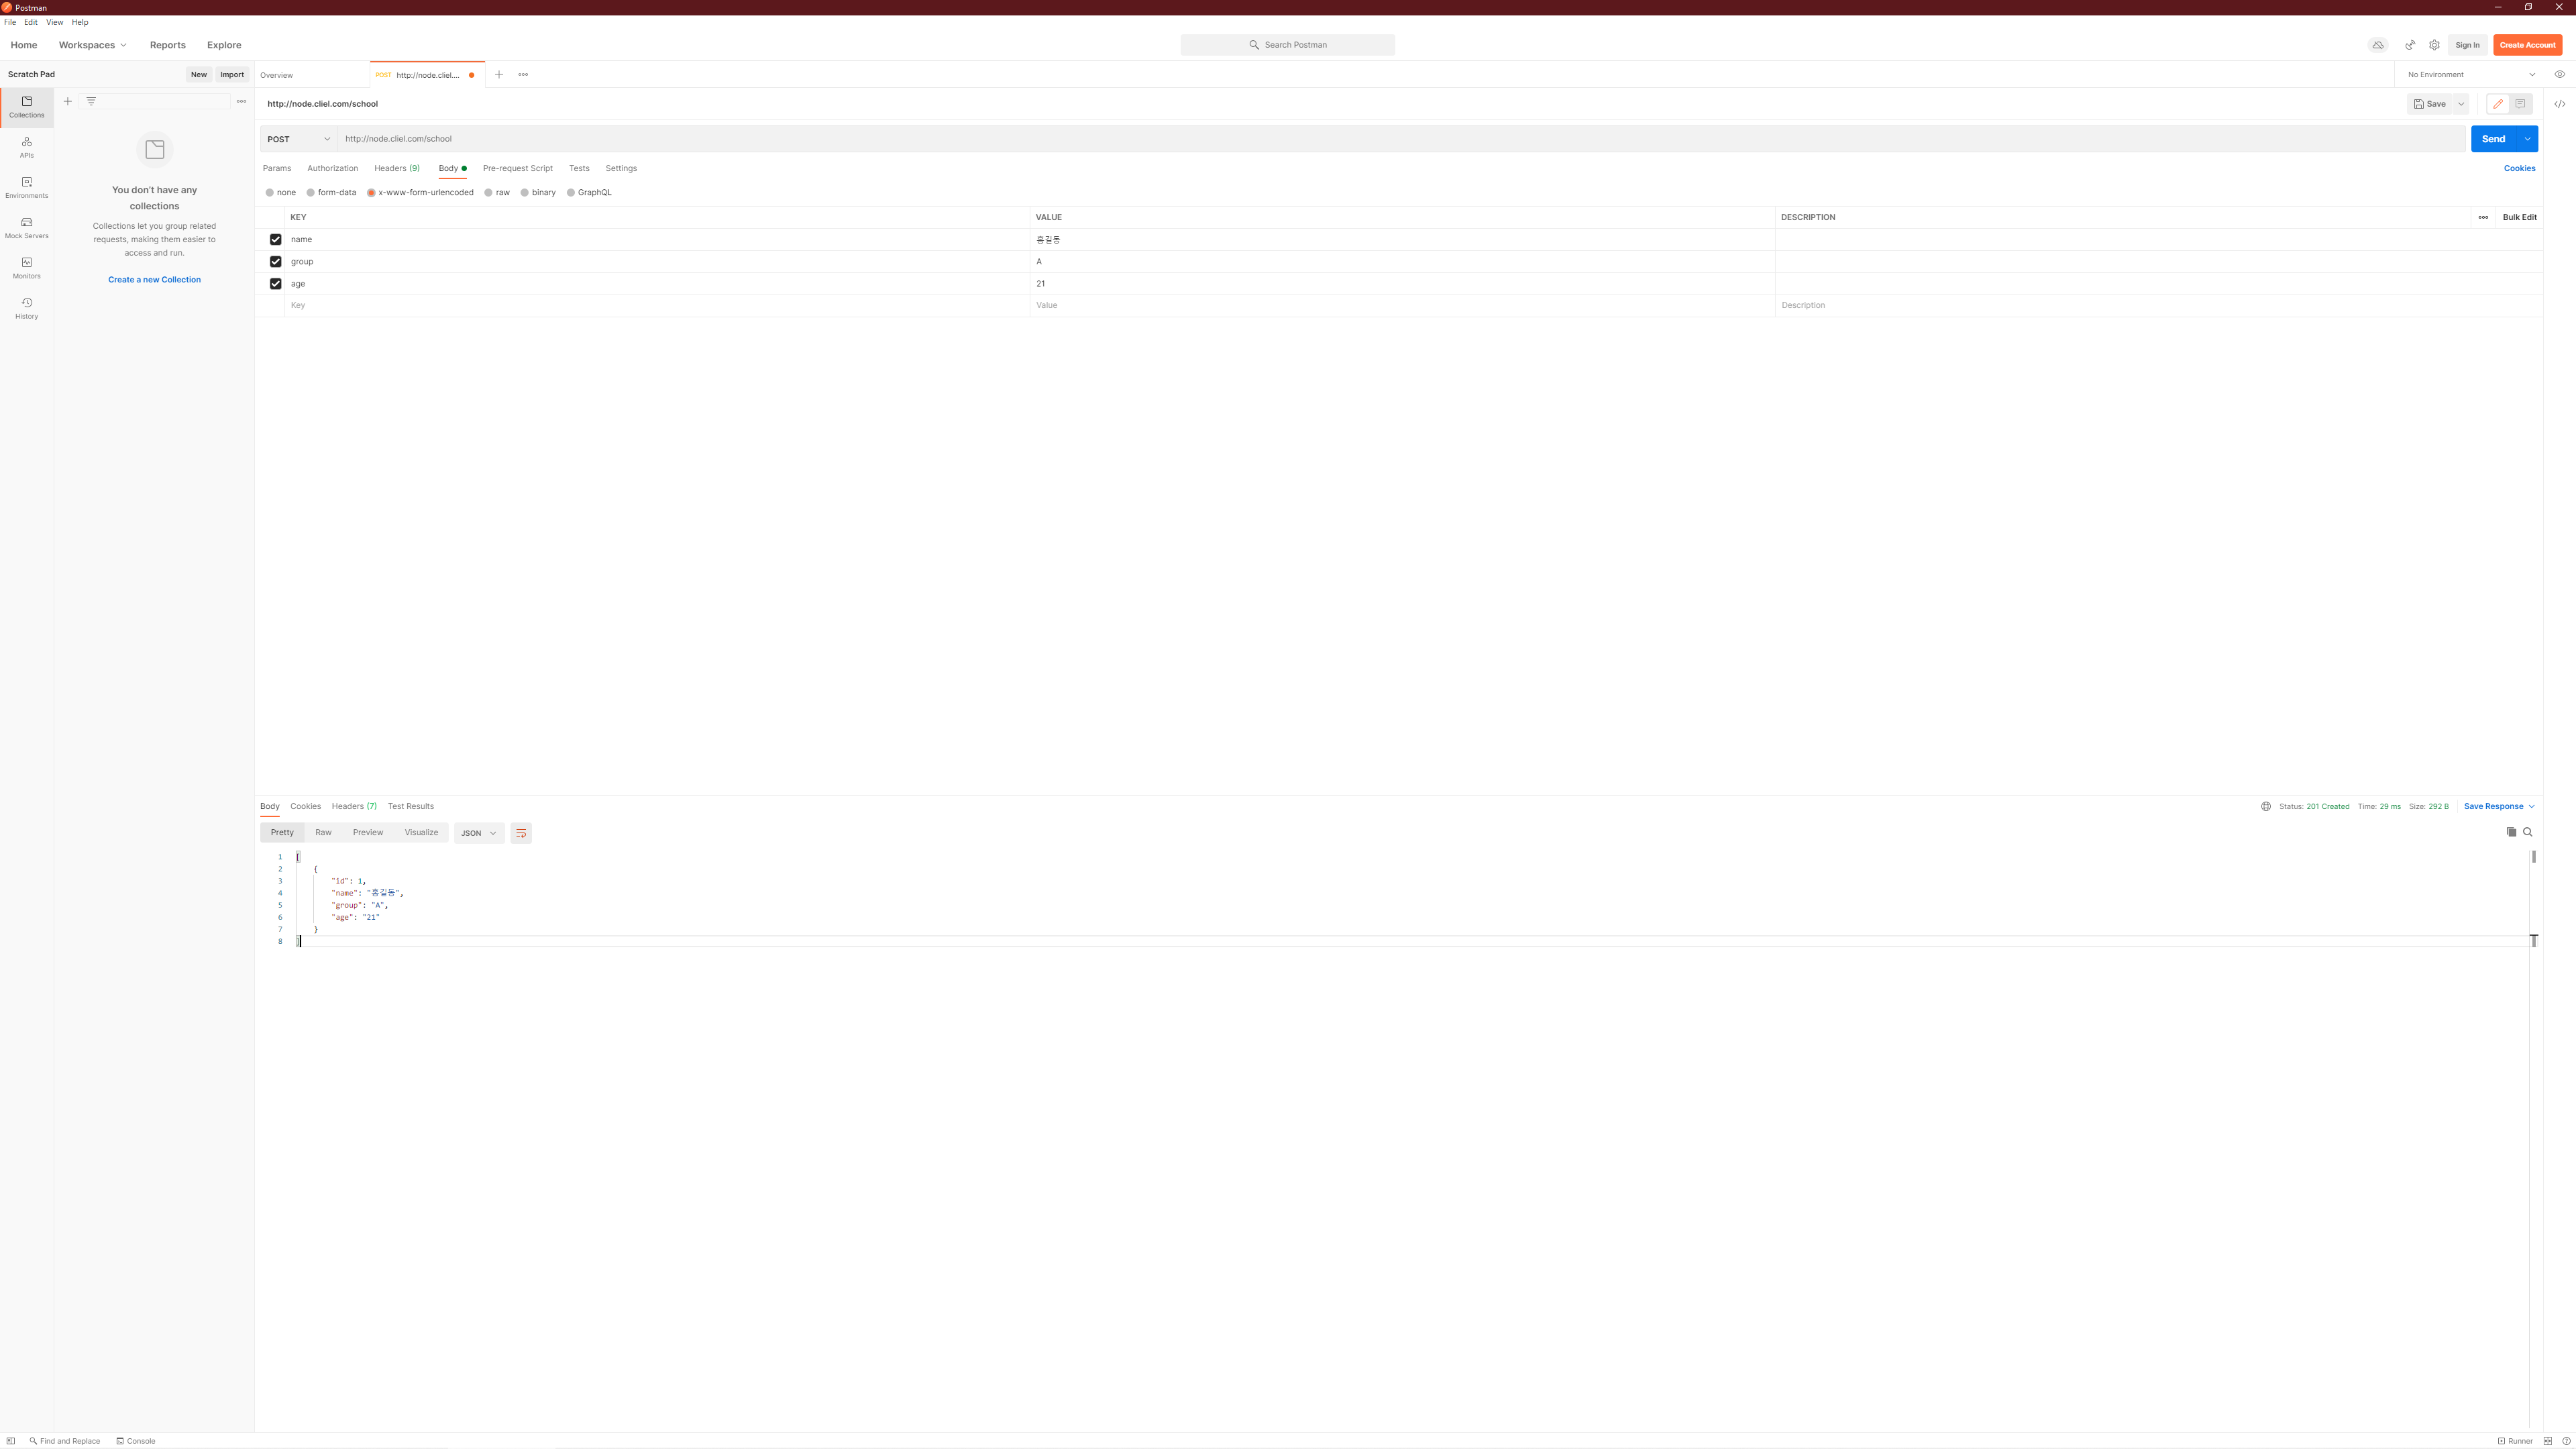
위와 같이 Controller와 Service를 작성한 후 테스트해 봅니다.
이번에는 특정 ID에 해당하는 student정보를 반환하는 함수를 Serivce에 추가합니다. 해당 함수는 지정한 student를 찾을 수 없으면 오류를 반환합니다.
getStudent(id: string) {
    const std = this.students.find(x => x.id === +id);

    if (!std) {
        throw new NotFoundException('student 정보 없음');
    }

    return std;
}
Controller에서는 id 매개변수 값을 받아 이를 Service의 getStudent() 함수를 호출할 때 매개변수로 전덜 허여 원하는 student를 가져올 수 있도록 합니다.
@Get(':id')
async getStudent(@Param('id') id: string) {
    return await this.schoolService.getStudent(id);
}
'Web > NestJS' 카테고리의 다른 글
| [nestjs] DTO (Data Transfer Object) (0) | 2021.03.16 |
|---|---|
| [nestjs] validation (0) | 2021.03.16 |
| [nestjs] controller (0) | 2021.03.15 |
| [nestjs] 시작하기 (0) | 2021.03.15 |
| [NestJS] 소개및 설치 (0) | 2021.03.15 |